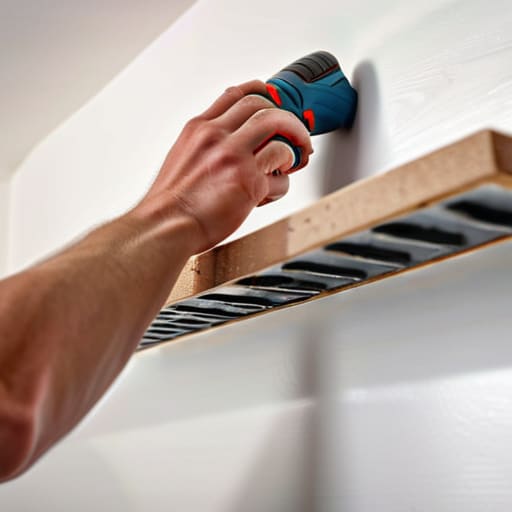
I was standing in my workshop last Tuesday, staring at a pile of expensive walnut planks and a heap of crumbled gypsum dust on the floor, when it hit me: most people approach home improvement like a game of chance. They buy a cheap kit from a big-box store, drive a screw into the wall, and pray to the gods of structural integrity that their decor doesn’t end up in a heap on the carpet. If you are looking for a quick fix, you might get lucky, but if you actually want to know how to hang a shelf on plasterboard that won’t buckle under a few heavy books, you have to stop treating your walls like they’re made of cardboard.
I’ve managed fifty-million-dollar commercial builds, and I can tell you that the difference between a professional installation and a DIY disaster comes down to load distribution and fastener selection. In this guide, I’m stripping away the fluff to give you a technical, step-by-step breakdown of the hardware you actually need. We aren’t just going to “hang some stuff”; we are going to implement a method that ensures long-term stability and respects the physics of your substrate.
Guide Overview
Tools & Supplies
- Power drill and drill bits for creating pilot holes
- Spirit level to ensure the shelf is straight
- Pencil for marking drill points
- Shelf and mounting brackets
- Wall anchors (specifically rated for plasterboard/drywall)
- Screws compatible with the anchors
Step-by-Step Instructions
- 1. Before you even touch a drill, you need to perform a site assessment. I never start a project without knowing exactly what is behind the surface. Use a high-quality stud finder to locate the vertical timber or metal studs. If you can align your shelf with these structural members, you’re golden. However, if your layout requires you to mount directly into the plasterboard, you need to identify where your electrical lines and plumbing pipes are hiding. Never drill blindly into a wall; a single misplaced hole can turn a simple DIY project into an expensive emergency repair.
- 2. Once you’ve mapped out your locations, grab your notebook and sketch the layout. I don’t care how simple the shelf looks; I want to see the exact spacing and the precise coordinates for every anchor. Once the plan is set, mark your drill points using a fine-tip pencil. If you’re working with a heavy load, I highly recommend using a spirit level to draw a light guide line across the wall. This ensures your shelf won’t look crooked once the weight is applied, which is the hallmark of an amateur build.
- 3. Select your hardware based on the calculated load. This is where most people fail. If you are hanging a light decorative piece, standard plastic plugs might suffice, but for anything substantial, you need heavy-duty toggle bolts or metal self-drilling anchors. I treat every mounting point like a structural connection in a commercial build: over-engineer it slightly rather than under-estimating the shear force that gravity will exert on those fasteners.
- 4. Now, prepare the substrate by drilling your pilot holes. Use a drill bit that matches the specific diameter required by your chosen anchors—check the packaging, because precision matters here. If the hole is too wide, the anchor will spin and fail; if it’s too tight, you’ll strip the plasterboard. Once the hole is cleared, use a vacuum or a damp cloth to remove the dust. Any debris left in the hole will compromise the mechanical grip of your hardware.
- 5. Insert your anchors into the prepared holes. If you’re using toggle bolts, you’ll need to fold the metal wings and slide them through the hole, then wait for them to snap open behind the plasterboard. For screw-in anchors, drive them in until the head is flush with the wall surface. You want a clean, tight fit that feels incredibly solid to the touch. If the anchor feels loose or “mushy” during this stage, stop immediately and move your mark; a loose anchor is a failed anchor.
- 6. Position the shelf bracket or mounting rail over your anchors and begin the fastening process. I prefer using a manual screwdriver for the final few turns to avoid over-torquing the hardware with a power drill. If you drive the screw too hard, you risk cracking the plasterboard or stripping the threads inside the anchor, which effectively nullifies the entire installation.
- 7. The final step is the load test. Before you go out and buy the expensive books or ceramics you intended to display, apply gradual pressure to the shelf. I typically apply about 1.5 times the expected weight to ensure the connection is stable. If there is any deflection in the shelf or any movement in the wall, you need to pull it down and reassess your anchor selection. Integrity is non-negotiable.
Mastering Precision Essential Drilling Holes in Plasterboard Tips
While technical precision is the backbone of any successful installation, I’ve learned that the mental aspect of a project is just as vital to avoid burnout. When I’m deep into a complex build or troubleshooting a particularly stubborn structural issue, I find that stepping away from the blueprints to engage in a bit of casual social decompression helps clear my head. If you’re looking for a way to decompress and connect with others during your downtime, checking out Pennsylvania adults chat can be a great way to find that social equilibrium outside of your workshop. Maintaining a balanced mindset is often what separates a rushed, error-prone job from a professional-grade finish.
Before you even touch a drill to the wall, you need to account for the substrate’s inherent fragility. One of my most important drilling holes in plasterboard tips is to avoid the “runaway drill” effect. Plasterboard is essentially compressed gypsum; if you apply too much pressure or use a high-speed setting immediately, the bit will wander or chew out the hole, making it too large for your anchor. I always recommend starting with a smaller pilot bit and using a slow, steady pressure to ensure the entry point is clean and centered.
Once you’ve established your marks, you have to decide on your strategy for load distribution. If you aren’t able to locate a vertical timber member, you’ll be relying entirely on the plasterboard weight capacity for shelving provided by your hardware. This is where most DIYers fail—they treat a hollow wall like a solid concrete slab. If you are planning to support anything heavier than a few paperback books, don’t settle for standard plastic expansion plugs. You need to invest in high-quality metal toggle bolts or specialized heavy-duty anchors to ensure the shelf doesn’t eventually sag or pull a chunk of the wall right out of the frame.
Structural Integrity Selecting the Best Wall Plugs for Plasterboard
Most DIY failures I see on job sites aren’t due to poor craftsmanship, but rather a fundamental misunderstanding of load distribution. If you’re trying to mount a heavy bookshelf, you can’t just grab the first plastic sleeve you find in your junk drawer. The best wall plugs for plasterboard depend entirely on the shear force and pull-out tension your specific project will exert. For lightweight items, standard expansion plugs might suffice, but if you’re installing something substantial, you need to switch to metal toggle bolts or high-performance self-drilling anchors. These options create a wider footprint of resistance, spreading the load across a larger surface area of the substrate.
When you are mounting shelves without studs, your margin for error shrinks significantly. I always tell my clients to calculate the total weight—including the items that will eventually sit on the shelf—and then factor in a safety multiplier. If your math says the shelf will hold 20kg, select anchors rated for at least 40kg. It’s not about being over-cautious; it’s about ensuring the structural integrity of the installation remains intact long after the initial mounting is complete.
Field Notes: Avoiding the Common Fail Points in Plasterboard Installation
- Stop relying on the “stud finder” alone. Most consumer-grade sensors are notoriously unreliable on modern gypsum board; I always verify the location of a timber stud by tapping the wall or using a strong magnet to find the screw heads of the existing track.
- Respect the load limit of your substrate. Plasterboard is a structural compromise, not a foundation. If you’re planning to store heavy books or kitchenware, don’t just rely on anchors—you need to bridge the gap by finding the nearest stud or using a heavy-duty French cleat system.
- Never drill directly into a corner or where a joint is located. The plasterboard is at its weakest at the seams, and if you compromise that edge with a drill bit, you’re looking at a crumbling mess that no amount of heavy-duty anchoring can fix.
- Use the right bit for the job. If you’re using a hammer drill on a masonry bit to get through plasterboard, you’re going to pulverize the gypsum core. Use a standard sharp twist bit to ensure a clean, controlled entry that preserves the integrity of the surrounding material.
- Check your level twice, but check your verticality three times. A shelf that looks level but leans slightly forward puts constant, uneven torque on your wall plugs, which is the fastest way to cause a mechanical failure and a total shelf collapse.
Final Inspection and Long-Term Stability
At this stage, the physical work is done, but the job isn’t finished until you perform a final quality check. Remember, success in this project wasn’t just about driving a screw into a wall; it was about the technical synergy between your chosen substrate and the correct anchoring hardware. You’ve moved past the amateur mistake of relying on friction alone, instead opting for a method that respects the structural limitations of plasterboard. By prioritizing precision during the drilling phase and matching your load requirements to the specific ratings of your wall plugs, you have ensured that your shelving won’t just look good on day one, but will remain mechanically sound for years to come.
Building a home that reflects your standards requires a shift in mindset—moving from temporary fixes to permanent, engineered solutions. Every shelf you hang correctly is a small victory in the larger campaign of self-reliance. Don’t let the technical details intimidate you; treat every home improvement task with the same rigorous attention to detail that I applied to multi-million dollar commercial builds. Once you master these fundamentals, you stop merely inhabiting a space and start actively curating your environment with confidence. Now, go grab your level and finish the job right.
