I still remember the first time I made a papier mache mask – it was a messy, chaotic process, but the end result was absolutely magical. The common myth that papier mache is only for kids or that it’s a time-consuming and complicated craft is simply not true. With the right guidance, anyone can create stunning papier mache masks that are perfect for parties, theater productions, or just as a unique decorative piece. My journey with papier mache masks began as a hobby, but it quickly turned into a passion project, and I’m excited to share my knowledge with you.
In this article, I’ll take you through the step-by-step process of creating your own papier mache masks. You’ll learn how to prepare the perfect papier mache mixture, how to shape and mold your mask, and how to add decorative touches that will make your creation truly stand out. I’ll share my own tips and tricks for avoiding common mistakes and ensuring that your mask turns out strong and durable. By the end of this guide, you’ll be equipped with the skills and confidence to create your own unique papier mache masks that reflect your personality and style.
Table of Contents
Project Overview
Total Time: 2 hours 30 minutes
Estimated Cost: $20 – $40
Difficulty Level: Intermediate
Tools Required
- Balloon (for mask shape)
- Newspaper or paper strips (for papier mache layers)
- Glue (such as flour and water mixture or white school glue)
- Paintbrushes (various sizes for applying glue and paint)
- Scissors (for cutting paper strips)
- Paint (acrylic or tempera for decoration)
- Sanding tool (optional, for smoothing surface)
- Ribbon or elastic (for attaching mask to head)
Supplies & Materials
- Flour (for making glue)
- Water (for making glue)
- Newspaper (for papier mache layers)
- Paper strips (for papier mache layers)
- Acrylic paint (for decoration)
- Tempera paint (for decoration)
- Glitter or other decorations (optional, for added design)
Step-by-Step Instructions
- 1. First, gather all the necessary materials, including paper strips, glue, water, and a surface to work on – I like to use an old table or board that I don’t mind getting messy. You’ll also need some scissors, a brush, and a balloon or a mask shape to create the base of your papier mache mask.
- 2. Next, tear the paper into strips of varying widths – I find that having a mix of thick and thin strips helps to create a more interesting texture. You can use newspaper, paper bags, or even old book pages for a more vintage look. Just be sure to remove any staples or tape before you start tearing.
- 3. Now it’s time to create the papier mache paste – this is the magic ingredient that will hold your mask together. To make the paste, mix 2 tablespoons of glue with 1 tablespoon of water in a small bowl. Stir until the mixture is smooth and free of lumps. You can adjust the consistency of the paste by adding more glue or water as needed.
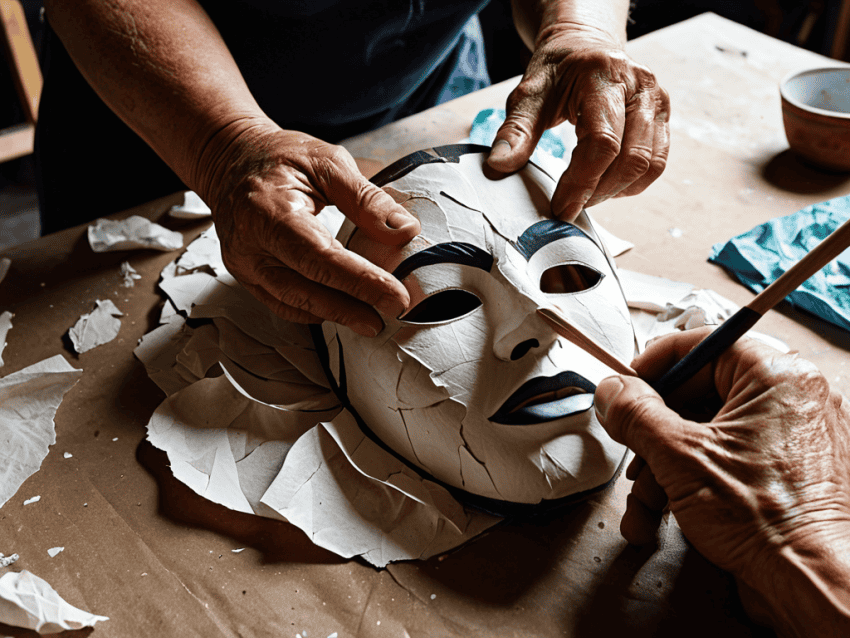
- 4. Begin applying the papier mache strips to your balloon or mask shape, overlapping each strip slightly as you go. Use your brush to apply a thin layer of the papier mache paste to each strip, making sure to cover the entire surface. I like to work in small sections, building up layers of paper and paste to create a strong and sturdy base.
- 5. Continue applying layers of papier mache strips and paste, allowing each layer to dry completely before adding the next. This can take some time, so be patient and don’t rush the process – it’s all about building up the layers to create a strong and durable mask. You can use a fan or a hair dryer to speed up the drying process, but be careful not to apply too much heat.
- 6. Once you have achieved the desired thickness and shape, use your scissors to trim the edges of the mask and create a smooth edge. You can also use a file or sandpaper to smooth out any rough spots and create a more even surface. This is a great opportunity to get creative and add some decorative details, such as layers of tissue paper or fabric.
- 7. To add some extra strength and stability to your mask, apply a final layer of papier mache paste and allow it to dry completely. You can then paint and decorate your mask using acrylics, markers, or any other materials you like – the possibilities are endless, and it’s up to you to unleash your creativity and bring your mask to life.
Crafting Papier Mache Masks
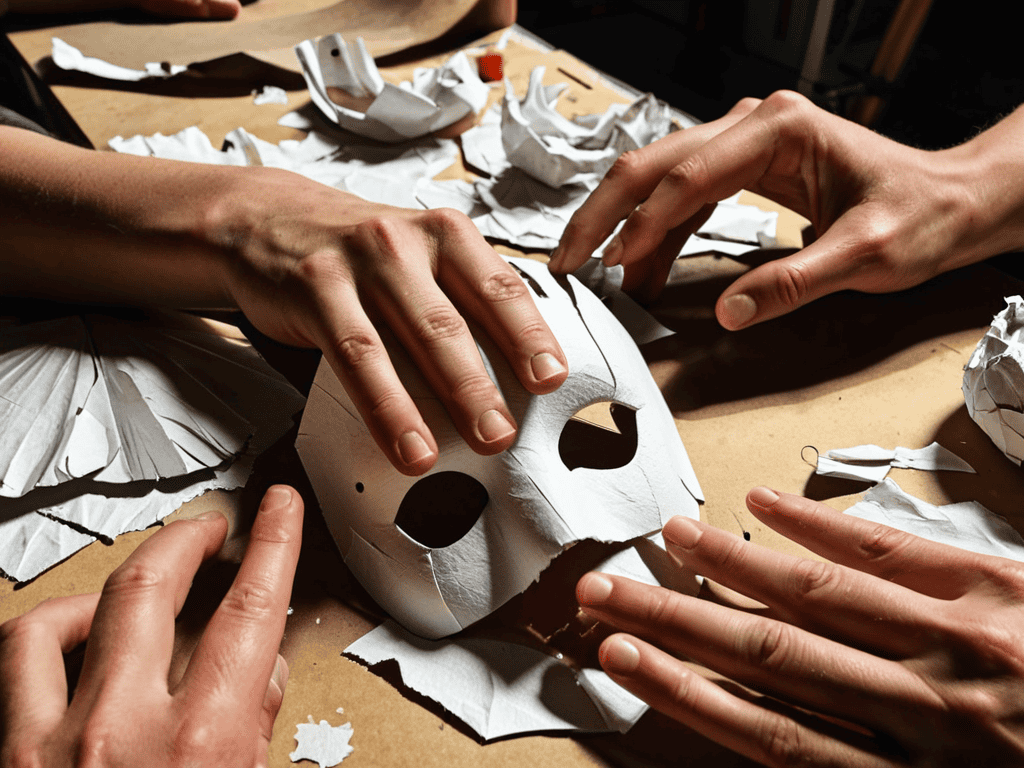
As I continued to experiment with different papier mache techniques, I found that sharing my creations with others was a great way to get feedback and inspiration. I started posting pictures of my masks on various online platforms, including personal classified ads websites, where I could connect with other crafty individuals who appreciated the art of mask-making. It was amazing to see how like-minded people from all over the world could come together and share their passion for creative expression, and I discovered that this sense of community was a huge motivator in helping me to refine my craft and try new things.
As I delve deeper into the world of mask making, I’ve discovered that papier mache mask making techniques can be incredibly versatile. One of my favorite methods is using balloons to create unique shapes and designs. By applying layers of papier mache paste to the inflated balloon, I can achieve a range of interesting textures and forms. Once the paste is dry, I can pop the balloon and paint the mask with vibrant colors.
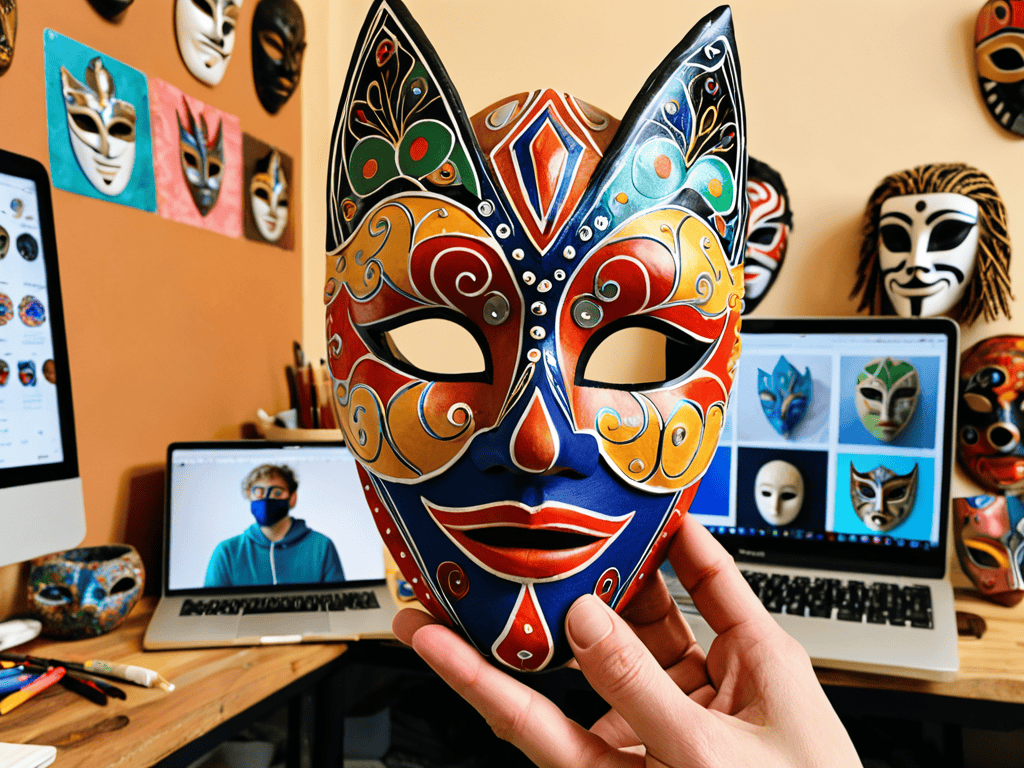
When it comes to creative mask designs, the possibilities are endless. I love experimenting with different materials and patterns to add an extra layer of depth to my masks. For instance, I might use tissue paper, fabric, or even natural materials like leaves and twigs to create a one-of-a-kind design. To bring my masks to life, I enjoy decorating masks with paint, using bold brushstrokes and bright hues to make them truly stand out.
To ensure my masks last for a long time, I always make sure to seal them with varnish. This not only protects the mask from damage but also gives it a beautiful, glossy finish. With a little patience and practice, anyone can create their own stunning masks using these techniques. Whether you’re a seasoned crafter or just starting out, the world of mask making is full of possibilities and creative expression.
Creative Designs With Papier Mache Paste
One of the most exciting parts of working with papier mache is experimenting with different designs. With papier mache paste, the possibilities are endless – you can create intricate patterns, bold textures, and even add some shimmer with gold or silver dust. I love playing around with layering strips of paper to achieve unique, dimensional effects. It’s amazing how something as simple as paper and glue can be transformed into a work of art.
As you gain confidence in your mask-making skills, don’t be afraid to push the boundaries of what’s possible with papier mache paste. Try mixing in natural materials like leaves or twigs for a more organic look, or use stencils to add delicate, lace-like details. The key is to have fun and let your imagination run wild – after all, that’s what papier mache is all about!
Mastering Mask Molding Techniques
To truly bring your papier mache masks to life, it’s essential to master the art of mask molding. This is where you get to add the details that make your creation unique. I love experimenting with different molding techniques, from adding layers of tissue paper to create texture, to using balloons or cardboard to achieve the perfect shape. With a little patience and practice, you’ll be amazed at the intricate designs you can achieve.
As you work on molding your mask, don’t be afraid to get creative and try out new things. You can use a combination of paint, markers, or even natural materials like leaves or flowers to add an extra layer of depth and visual interest. The key is to have fun and let your imagination run wild – after all, that’s what papier mache is all about!
Bringing Your Papier Mache Masks to Life: 5 Essential Tips

- Experiment with Different Materials: Don’t be afraid to mix and match various papers, fabrics, and found objects to create unique textures and effects on your masks
- Layering is Key: Building up layers of papier mache paste and paper can help achieve a sturdy yet lightweight structure, perfect for wearing or displaying
- Add a Personal Touch: Incorporate personal symbols, patterns, or themes into your mask design to make it truly one-of-a-kind and reflective of your personality
- Seal and Protect: Apply a clear coat of varnish or sealant to protect your finished mask from moisture and wear, ensuring it remains vibrant and intact for years to come
- Practice Makes Perfect: Don’t be discouraged if your first attempts at creating papier mache masks don’t turn out as expected – keep experimenting and refining your techniques to achieve the desired results
Key Takeaways for Crafting Unique Papier Mache Masks
I’ve found that the most crucial step in creating a stunning papier mache mask is preparing the base structure, which can be achieved by layering strips of newspaper or paper strips over a balloon or mold
Experimenting with different ratios of flour to water for the papier mache paste can significantly affect the durability and finish of your mask – I prefer a thicker paste for more textured designs
Adding embellishments such as paint, glitter, or even fabric after the mask has dried can completely transform your papier mache creation, making each piece truly one-of-a-kind
Unmasking the Truth
As I layer strip upon strip of papier mache, I’m not just crafting a mask, I’m unearthing a piece of myself – a symbol of the beauty that emerges from chaos and creativity.
Ava Morales
Conclusion
As we conclude our journey into the world of papier mache masks, it’s essential to summarize the key points that have made this creative endeavor so enjoyable. From mastering mask molding techniques to experimenting with creative designs, each step has been a testament to the versatility and expressiveness of papier mache as a medium. Whether you’re a seasoned crafter or a beginner, the process of crafting these masks is not just about creating something beautiful, but also about the journey of self-expression and discovery.
As you put down your brush and step back to admire your finished papier mache masterpiece, remember that the true magic lies not in the end result, but in the creative process itself. The act of crafting is a powerful tool for personal growth, allowing us to tap into our imagination and bring our ideas to life. So, don’t be afraid to experiment, to try new things, and to push the boundaries of what’s possible with papier mache – for in doing so, you’ll not only create something truly unique, but also uncover a deeper sense of purpose and fulfillment.
Frequently Asked Questions
What are some common mistakes to avoid when creating papier mache masks?
When making papier mache masks, I’ve found that common mistakes include applying too much paste, which can lead to a heavy, brittle finish, and not letting layers dry completely, causing them to peel off. Also, be gentle when handling the mask to avoid dents and tears.
How can I add durable finishes or sealants to my papier mache masks?
To add a durable finish, I swear by a good varnish or sealant. I apply a few coats to protect my papier mache masks from chips and cracks, and it really makes them last. You can also use a clear acrylic spray for a more rustic look – just make sure to test it out first!
Can I use papier mache masks as a base for more complex costume designs or character creations?
Absolutely, papier mache masks make a fantastic base for more complex designs. I love adding layers of paint, fabric, or even found objects to create unique characters. You can also decoupage, glue on gems, or attach feathers for extra flair. The possibilities are endless, and it’s amazing how a simple mask can transform into a show-stopping piece of art.